.png)
How to Secure GeoServer Layers with Role-Based Access and Token Authorization
- SAHANA A

- Jul 15, 2025
- 6 min read
Introduction
Imagine you're building a geospatial dashboard for city planners in Bengaluru. Your team publishes layers like traffic density, fiber cable layouts, and sensitive infrastructure. But without proper access control, these datasets are exposed to the public or could be edited by unauthorized users — a serious risk in urban planning.
In this blog, you'll learn how to secure your GeoServer layers using Role-Based Access Control (RBAC) and Token-Based Authentication. We'll walk through step-by-step configurations, including user and role setup, permission enforcement, and how to integrate modern token-based login systems like OAuth2 and JWT. Whether you're deploying public dashboards or internal analytics tools, this guide will help you build secure and scalable geospatial applications.
Step-by-Step Guide
1. Why GeoServer Layer Security is Critical
GeoServer is widely used to serve geospatial data through OGC standards like WMS (Web Map Service) and WFS (Web Feature Service). By default, these services are open and accessible to anyone with the URL — making them vulnerable to unauthorized use if not properly secured.
Open access might be acceptable during initial development or for public datasets. However, in most production environments, it poses serious risks.To prevent risks, it's essential to implement structured access control mechanisms that define who can access what, and under what conditions.
Securing your GeoServer environment helps ensure:
Data privacy — only authorized users view or interact with specific layers.
Controlled service usage — prevent abuse and manage traffic load.
Role-based data delivery — show different layers or resolutions based on user roles.
Compliance with internal IT and data governance policies — especially when working on governmental, infrastructure, or private projects.
2. GeoServer Security Architecture Overview
GeoServer comes with a flexible, role-based security framework that allows you to control access at various levels — from users and services to specific layers.
Users: These are individual login accounts used to identify and authenticate people accessing GeoServer. Each user can be assigned one or more roles to control their access rights.
Roles: Roles define sets of permissions (read, write, admin, etc.) and are assigned to users or groups. They determine what actions a user can perform on services and data layers.
Workspaces/Layers: Workspaces organize related layers and allow permissions to be set at a group level. Layers within a workspace inherit access rules unless overridden individually.
You can define permissions such as read-only or full access for each role. GeoServer then enforces these rules automatically — for example, a WMS request from a ROLE_VIEWER user will not be able to access layers restricted to ROLE_ADMIN.
3. Role-Based Access Control (RBAC)
Role-Based Access Control (RBAC) allows you to manage who can access which datasets and what actions they can perform (read, write, admin). It’s one of the most effective ways to control access in GeoServer, especially when working with multiple users or exposing your services through a web GIS frontend.
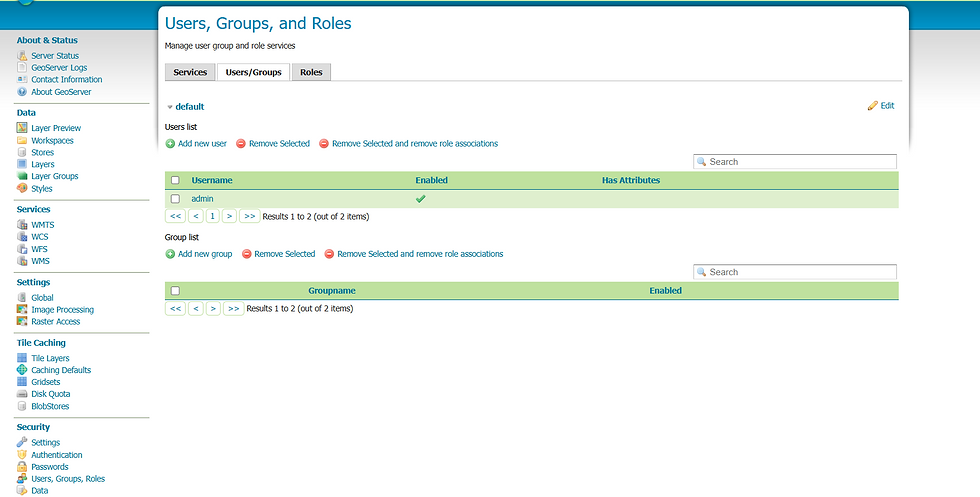
Groups, Roles, and Users in GeoServer
To simplify and scale GeoServer access control, it's efficient to define roles at the group level first, then just assign users to those groups. This ensures consistent permissions and reduces manual overhead.
Path

Step 1: Create Groups
Start by creating user groups based on access levels. Later, roles will be assigned directly to these groups.
Create these groups:
group_reader – for read-only access
group_editor – for both read and edit access
Path

Click Add new group
Enter group name (group_reader or group_editor)
Save

Step 2: Create Roles and Assign Them to Groups
Now define roles and map them to the corresponding groups.
Roles to create:
Role Name | Parent Role | Assigned Group |
ROLE_READER | (None) | group_reader |
ROLE_EDITOR | ROLE_READER | group_editor |
Path

Click Add new role
Define role name and optionally set a parent role (e.g., ROLE_READER for ROLE_EDITOR)
Assign the role to the appropriate group in the “Assign to Groups” section


Why role inheritance
This way, ROLE_EDITOR users also get all ROLE_READER capabilities without duplicating settings.
Step 3: Create Users and Assign to Groups
Finally, add users and assign them to the previously created groups. Users will automatically inherit roles based on their group membership.
Create these users:
Username | Group | Inherited Role |
User 1 | Group_Reader | Role_reader |
User 2 | Group_ Editor | Role_editor |
Path:

Click Add new user
Fill in username and password
Assign to appropriate group and role
Step 4: Apply Data Security Rules Based on Roles
Now define access rules for your GeoServer layers, using the roles that are automatically inherited via group membership.
Path:


Example 1: Read Access for role_reader
Workspace: topp
Layer: tasmania_cities
Allowed Role: role_reader
Users with the role_reader role can view this layer on the map.
Other users (like editors) can still see it, but viewers are restricted to just this layer.
Example 2: Write Access for role_editor
Workspace: topp
Layer: tasmania_roads
Allowed Role: role_editor
Users with the role_editor role can edit this layer (such as updating roads).
View-only users (like those with role_reader) cannot make any changes.
Benefits of Using RBAC in GeoServer:
Granular control over who can view or modify data.
Easy scaling: New users can be assigned roles without editing every layer.
Organized access: Keep workspaces and permissions clean and manageable.
Auditability: You can trace access or misuse by user role and timestamp
4. Token-Based Authentication in GeoServer (JWT/OAuth2)
In modern web apps and dashboards, logging in with a username and password alone is not enough — especially when serving sensitive GIS data. This is where Token-Based Authentication helps.
A JWT (JSON Web Token) is a small digital key that a user receives after logging in. This token is added to every API request to GeoServer. GeoServer reads the token, checks the user’s role, and allows or denies access.
Why Use Token Authentication?
No need to maintain server-side sessions (stateless)
Ideal for frontends built with React, Dash, or mobile apps
Tokens include user roles, so GeoServer can enforce layer access rules
Works with identity providers like Google, Auth0, or Keycloak
Example: A React dashboard with Mapbox can send tokens with each WMS/WFS request to GeoServer — ensuring only the right users get the right data.
How Does GeoServer Handle Tokens?
Option A: GeoFence Plugin
Easy-to-use plugin with a UI to manage access policies
Supports rules based on user, role, layer, or even IP address
Stores rules in a database (e.g., PostgreSQL)
Use this if your team prefers a low-code solution with visual rule management.
Option B: Spring Security Extension
Allows GeoServer to validate JWT tokens at the backend
Needs developer setup (XML config + token filter)
Good for integrating with enterprise login systems (like Keycloak)
Recommended for advanced users with backend access.
5. Frontend Integration (React, Dash, etc.)
Once tokens are issued after login, they must be sent in the header of every GeoServer request.
Example using Axios (JavaScript):

Example using Fetch:

Storing Tokens Securely
Use sessionStorage so tokens clear when the browser is closed
Avoid localStorage (it’s less secure)
Use HttpOnly cookies if your token is handled by the server
sessionStorage.setItem("accessToken", token);
Bonus Tip: Show Layers Based on Role
You can also load different layers in the frontend depending on the user's role stored inside the token:

6. Real-World Example: Bengaluru Fiber Network Dashboard
Let’s say you’re managing a fiber network map of Bengaluru using GeoServer. Different users need different levels of access:
Layer Name | Description | Access Role |
public:fiber_coverage | Public service coverage area | ROLE_VIEWER |
private:line_faults | Field faults reported by engineers | ROLE_EDITOR |
admin:core_routes | Internal planning & backbone routes | ROLE_ADMIN |
Role-Based Access in Action:
Public Users (ROLE_VIEWER):
Can view fiber_coverage to check service availability.
Field Engineers (ROLE_EDITOR):
Can update line_faults using WFS-T (editing service).
Admin Team (ROLE_ADMIN):
Can view and edit all layers, upload new files, and monitor API usage.
This setup uses both RBAC and token authentication to ensure each user only sees what they’re authorized to — protecting your infrastructure while enabling collaboration.
7. Best Practices
Always use HTTPS to protect tokens
Rotate JWT secrets regularly
Use short-lived tokens + refresh tokens
Audit role access monthly
Combine roles + tokens for layered security
Conclusion
GeoServer provides powerful tools for serving spatial data — but with great power comes great responsibility. By implementing Role-Based Access Control and Token-Based Authentication, you ensure that only the right users access the right data. This not only protects your infrastructure but also builds trust in the applications you develop.
AGSRT offers professional training on GeoServer and secure Web GIS deployment. Check out our advanced GIS development courses to upskill your team!
Bonus: Resources
- GeoServer Security Docs: https://docs.geoserver.org/stable/en/user/security/
- GeoFence Plugin: https://geoserver.geo-solutions.it/edu/en/security/geofence.html
- JWT Token Debugger: https://jwt.io/


Comments